

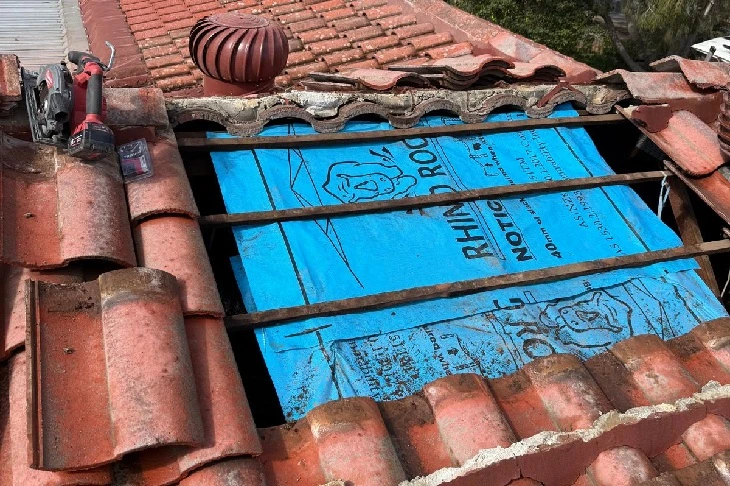
Clay tile roofs are some of the most attractive roofs in Adelaide – and some of the most misunderstood when it comes to leaks. A cracked terracotta tile doesn’t behave like a cracked Colorbond sheet. It’s brittle, it’s heavy, and one wrong step chasing the source of a leak can turn a single repair into five. If you’ve spotted a water stain on the ceiling and you’re weighing up whether to grab a ladder this weekend, here’s what the process actually involves – and where it tends to go wrong.
5 Steps On How To Fix The Leak
Step 1: Find the Real Source (Not Just the Stain)
Water on clay tile roofs rarely drips straight down. It runs along the underside of the tile, follows the battens, and shows up on the ceiling well away from where it actually got in. Start by checking directly above the stain, then work outward – look for cracked, chipped, or slipped tiles, lifted ridge capping, and deteriorated pointing at the ridge line.
Step 2: Get Up Safely (Or Ideally, Don’t)
Clay tiles crack under concentrated weight. Walking across them directly is how one damaged tile becomes six. If you do go up, distribute your weight, avoid stepping on tile edges, and never work a clay roof after rain – wet terracotta roof is treacherously slippery and far more brittle than it looks.
Step 3: Replace or Seal the Damaged Tile
A hairline crack can sometimes be sealed with a roofing-grade sealant applied along the crack line. A broken or chipped tile needs to come out entirely – usually eased free with a pry bar or wedge, taking care not to crack the tiles on either side- then replaced and reset.
Step 4: Check the Pointing and Ridge Capping
A huge share of clay roof leaks in Adelaide don’t come from the tiles at all – they come from failed pointing (the mortar bedding along the ridge). Once it cracks and lets water behind the ridge caps, no amount of tile-level patching fixes the problem.
Step 5: Clear the Valleys
Debris builds up in valleys faster than most homeowners realise, especially under gum trees. Blocked valleys force water sideways under the tiles instead of down and off the roof. Clearing them properly means lifting tiles, not just scooping from above.
Why This Is Where DIY Repairs Usually Fall Apart
On paper, the steps above look manageable. In practice, clay tile roofs punish guesswork. A tile that looks fine from the ground can be hairline-cracked and invisible until you’re standing on it. Sealants applied to the wrong crack, or applied when the tile is still damp underneath, fail within a season. And because water travels before it shows itself, most DIY “fixes” target the spot above the ceiling stain – which is very often not where the water is actually getting in.
There’s also the membrane question. If water has been getting past the tiles for a while, it may have already compromised the sarking underneath. That’s not a tile-swap job – it means lifting tiles across a section of roof, replacing the membrane, and re-laying everything correctly. Attempting that without experience on a clay roof usually causes more breakage than it solves.
When It’s Time to Call In the Professionals
If you’ve found the leak but the fix looks bigger than one tile, or you’re not confident diagnosing where the water is really entering, that’s the point to stop climbing and start calling.
Complete Roofing provides free, no-obligation roof inspections across every Adelaide suburb, with a licensed team that specialises in clay and terracotta tile repairs, ridge capping, and full tile roof restorations. Every job comes with fixed, transparent pricing and a 5-year workmanship warranty.
Spotted a leak in your clay tile roof? Get it fixed properly, the first time.